
Contents
Share
Are you tired of property listings that don’t attract the attention they deserve?
If so, the solution might be better photos. These can make or break the first impression of a property. They allow run-of-the-mill homes to stand out, or make exceptional properties look dull and drab. Agents who fail to curate their images are bound to get fewer enquiries, so it’s no wonder that many agencies are anxious to create the best possible visuals for their listings.
When it comes to property photography you have two options, get a professional to take the photos or do it yourself.
If you’re the do-it-yourself kind of agent, this article explains how to take better photos, from setting up the shot to post-shoot editing. That way, you can deliver the visual quality you desire, enhancing your property aesthetic across your listings and social media.
And, for those who want to save time and improve their photo quality further, our photo enhancement tools can rescue average images and raise them to a professional standard.
What are the most important factors for good property photos?
The ‘tools’ are arguably the most important factor when taking property photos for listings – complemented by a foundational understanding of property photography. You’ll be glad to know that it doesn’t take an expert to produce exceptional property images in 2025 – though that certainly helps!
We list the most important ‘ingredients’ for good property photos below:
1. Wide-angle camera capability
Wide angle lenses are the gold standard for high quality property photographs. They’re almost a ‘cheat code’ for attaining high quality images without much skill or experience.
Why? Normal lenses rarely capture the whole room, while wide angle lenses (typically 16-24mm) let you show it all, making the room feel larger and more spacious. Equally, it helps you capture multiple rooms and connecting hallways in a single, fluid shot.
So long as you don’t go too wide – often beyond the 16-24mm range – a wide-angle lens will serve you well. If the lens is too wide, it creates a ‘fisheye’ effect which looks both unrealistic and distorted.
However, nowadays, top end smartphones often have impressive cameras. These allow for wide-angle shots, and even special lens attachments for this exact purpose. So, if you’re on a tight budget, you might want to see what you can achieve with a humble smartphone before you splash out on a DSLR camera.
2. A DSLR camera
A DSLR (Digital Single-Lens Reflex) camera is the standard for most property photography. The main advantage is that it allows you to have complete, manual control over the camera – from the shutter speed, aperture and lens to its photos which are easy to edit in post-production.
Once again, you’ll notice that the main advantage here is the piece of equipment, not your skill with a camera – beyond some essential knowledge. Ultimately, a DSLR camera allows you to capture exactly the image you want in a range of different lighting conditions, environments and spaces (for example, through HDR bracketing). This is what most professional photographers use.
However, as we hinted earlier, you may be able to achieve acceptable results with a high-quality smartphone – and some intelligent post-production tools.
Alongside a DSLR camera, there are several other complementary tools which can greatly improve your property photography:
- A wide-angle lens – To capture entire rooms and make the home look spacious.
- A tripod – For image steadiness and consistency.
- A memory card – To make sure you can store many, high-quality photos on your camera.
- External flash equipment – To give you much greater control over lighting in your images.
3. Post-production tools
These are tools which you can use post-shoot to enhance photo quality, adjust lighting, improve the colours and much more. In the past, many photographers would automatically turn to Photoshop or Lightroom to make these corrections – but many more tools have come to the market which make post-photo editing much easier for estate agents.
For example, at PropertyBox, our AI tools allow you to remove clutter from photos instantly, erase specific objects, correct the colours, or change the sky from grey to blue at the touch of a button. This lowers the entry barrier for property photography, and makes post-image editing a lot easier for estate agents, ensuring you can showcase the property in the way you want.

What are the techniques & strategies for taking the best property photos?
After acquiring the tools for your property shoot, you’ll need to learn a bit of basic technique: how to set up the shots, get the angles right, and achieve professional quality. This has to do with the composition of the shot, as well as what images to take and how to get the property ready:
1. Tips for photography composition
Composition is what the shot is ‘made up of’. You need to pick the angles, decide what to leave in or out of the shot, and choose what to focus on. Here are some tips for great composition:
Use a wide lens to capture the whole room
As mentioned, wide-angle lenses help you to capture the whole room in one shot from a landscape perspective, which makes it look more spacious. Rooms with very high ceilings, or grand, tall staircases may require a narrower lens.
Shoot at an angle
Whether inside or outside the property, front facing shots can often make your images look flat. This isn’t good. So, get in the habit of taking slightly offset or ¾ view photos. It will give each room, and the property exterior, a larger, 3D appearance. An added bonus is that you are able to capture more of the property in a single image.
Take images from the corner of the room
Standing in the corner of the room helps you to shoot at an angle, while capturing the maximum amount of space available.
Frame images carefully
Usually, you want to keep all items completely in or out of the image. For example, including the whole of a wardrobe neatly in the frame – not with half of the drawers out of the picture (and half in). This gives a sense of neatness and completeness to your images.
Aim for the ‘golden section’
This may sound a little technical, but the ‘golden section’ is basically a 60/40 image split that creates naturally pleasing compositions. In property photography, instead of putting important features dead centre, you should place them about one-third of the way into the frame. For example:
– Position the horizon line about 1/3 from the top or bottom of the photo.
– Place a fireplace, window, or architectural feature 1/3 from the left or right edge.
– When shooting down a hallway, position the vanishing point off-centre.
This ensures your photos appear ‘right’ to the human eye which makes them instantly feel attractive to viewers.
Take pictures from waist height (usually)
The reason for this is quite intuitive. When photos are taken from eye-level, it might be at two-thirds of the room height – with the added tendency to angle the camera down to capture the floor. The top-down view can also foreshorten the furniture, making it look little and ‘stubby’.
Waist height photos capture the whole scene more evenly, ensuring that everything looks straight-on, with floor, walls and ceiling all evenly represented. Using a tripod is a great way to ensure that your images are level, consistent and balanced if your hands are not steady enough.
While waist height shots work well, make sure that features are not hidden behind one another – you may need to take alternate images to adjust for this, or take the photo from a greater height.
Aim through open doors for small rooms
This helps you capture more of the space and make the room appear larger. If you step into a small bathroom, for example, you’re likely to affect the lighting, cut items out of the shot and struggle to get the right angle. A wide-open door gives you the space you need to take a high-quality shot that doesn’t feel cramped.
Learn to work with the weather
We all know how unpredictable British weather can be, and that conditions can change in an instant. For property photography, an ideal day sits between the extremes of bright sunshine and heavy cloud cover. While a bit of sun is good, too much can cause extreme shadows or brightness, while dark cloud cover makes the home look gloomy and gothic! For that reason, the time of day matters. Soft light in the morning or late afternoon works better than bright, midday lighting conditions.
Another solution is to test multiple shots from different angles, at different times, and with different points of focus. Try setting the camera focus on the sky, the house, and a dark shadow and see how each of the shots turn out. If your initial round of images aren’t good enough, try a little later after taking some interior shots, and then a little later again at the end of the shoot.
And, if all else fails, PropertyBox’s suite of sky and colour correction tools can rescue your image in the post-production phase.

2. Tips for photos to take
While composition is essential, it’s also important to take a good balance of images from across the house to ensure that potential buyers get a good sense of it. This will vary depending upon the size of the home, but certain parts of the property need to be covered in every instance.
See below for an overview of the minimum shots to include in your property listing, and make sure you create a photoshoot list for reference, so you don’t miss any rooms on the day!
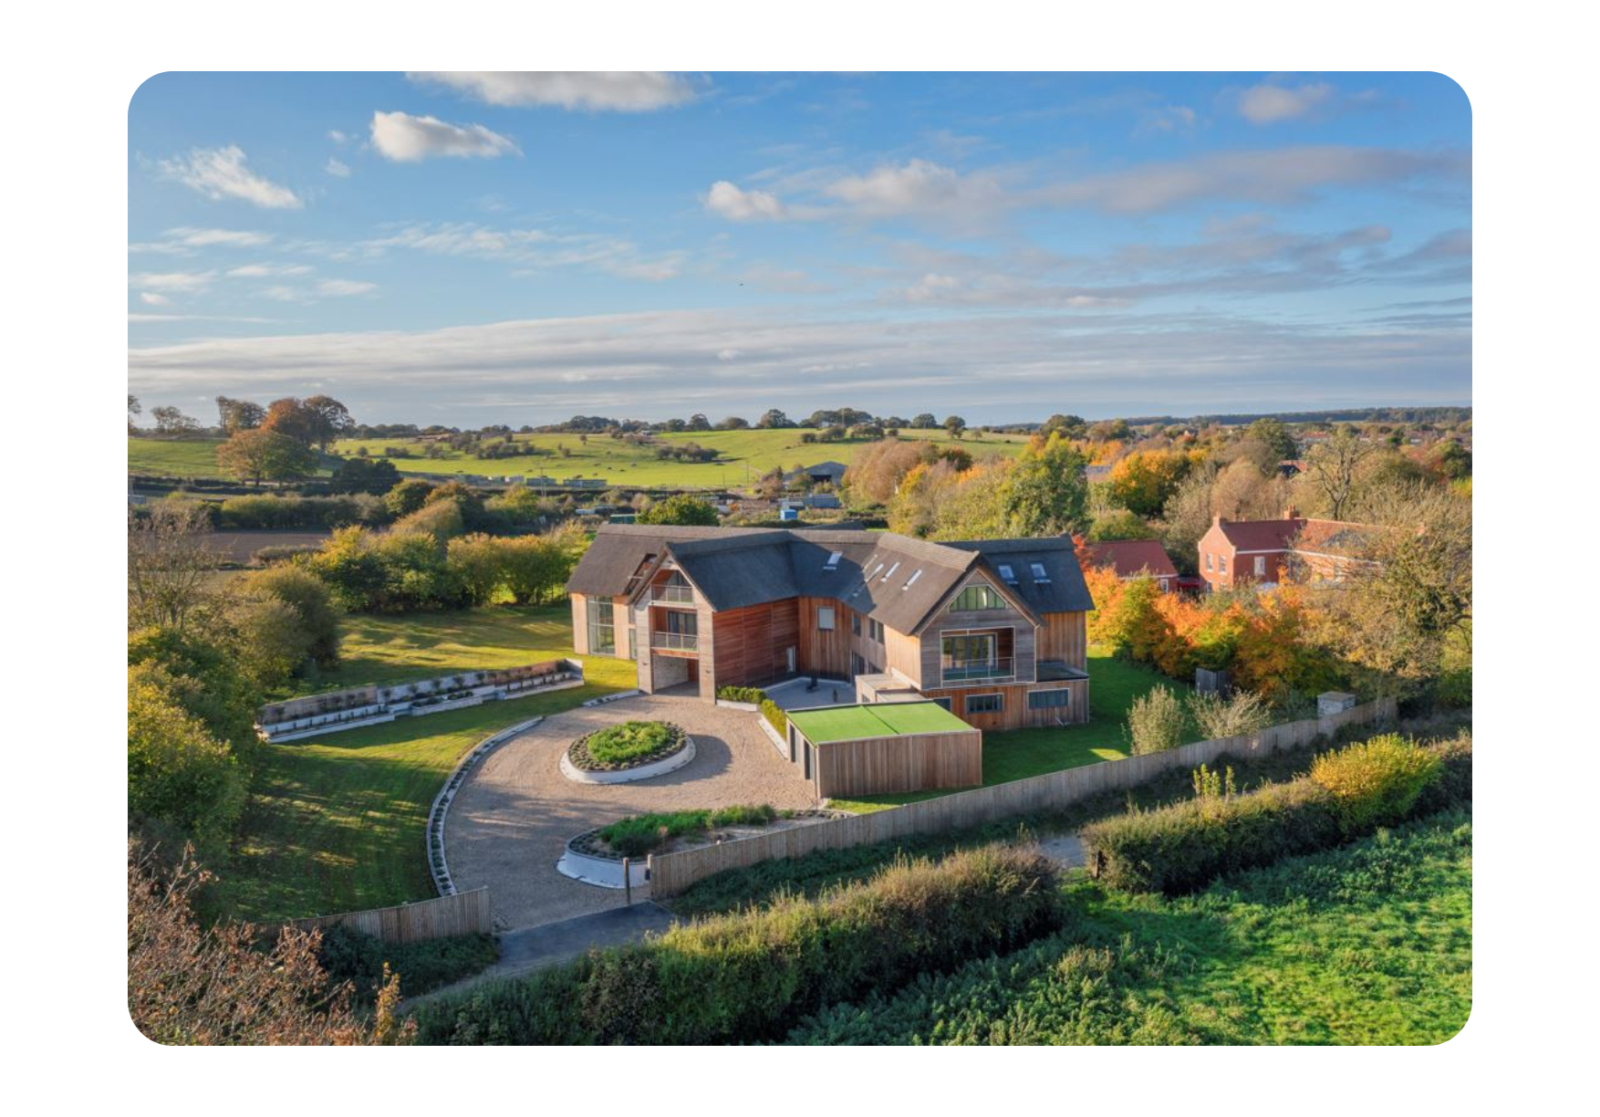
- 1-2 exterior shots from different angles – Include a side angle showing depth, and street view for kerb appeal. A front facing image could also be included.
- 1-2 living room/reception room shots – Try to cover angles that show the full room, including key features like fireplaces and any connected spaces.
- 1-2 kitchen shots – Cover the overall room view, and any alternate angles showing the layout and storage. Worktop and appliance detail shots are a valuable addition to consider where appropriate.
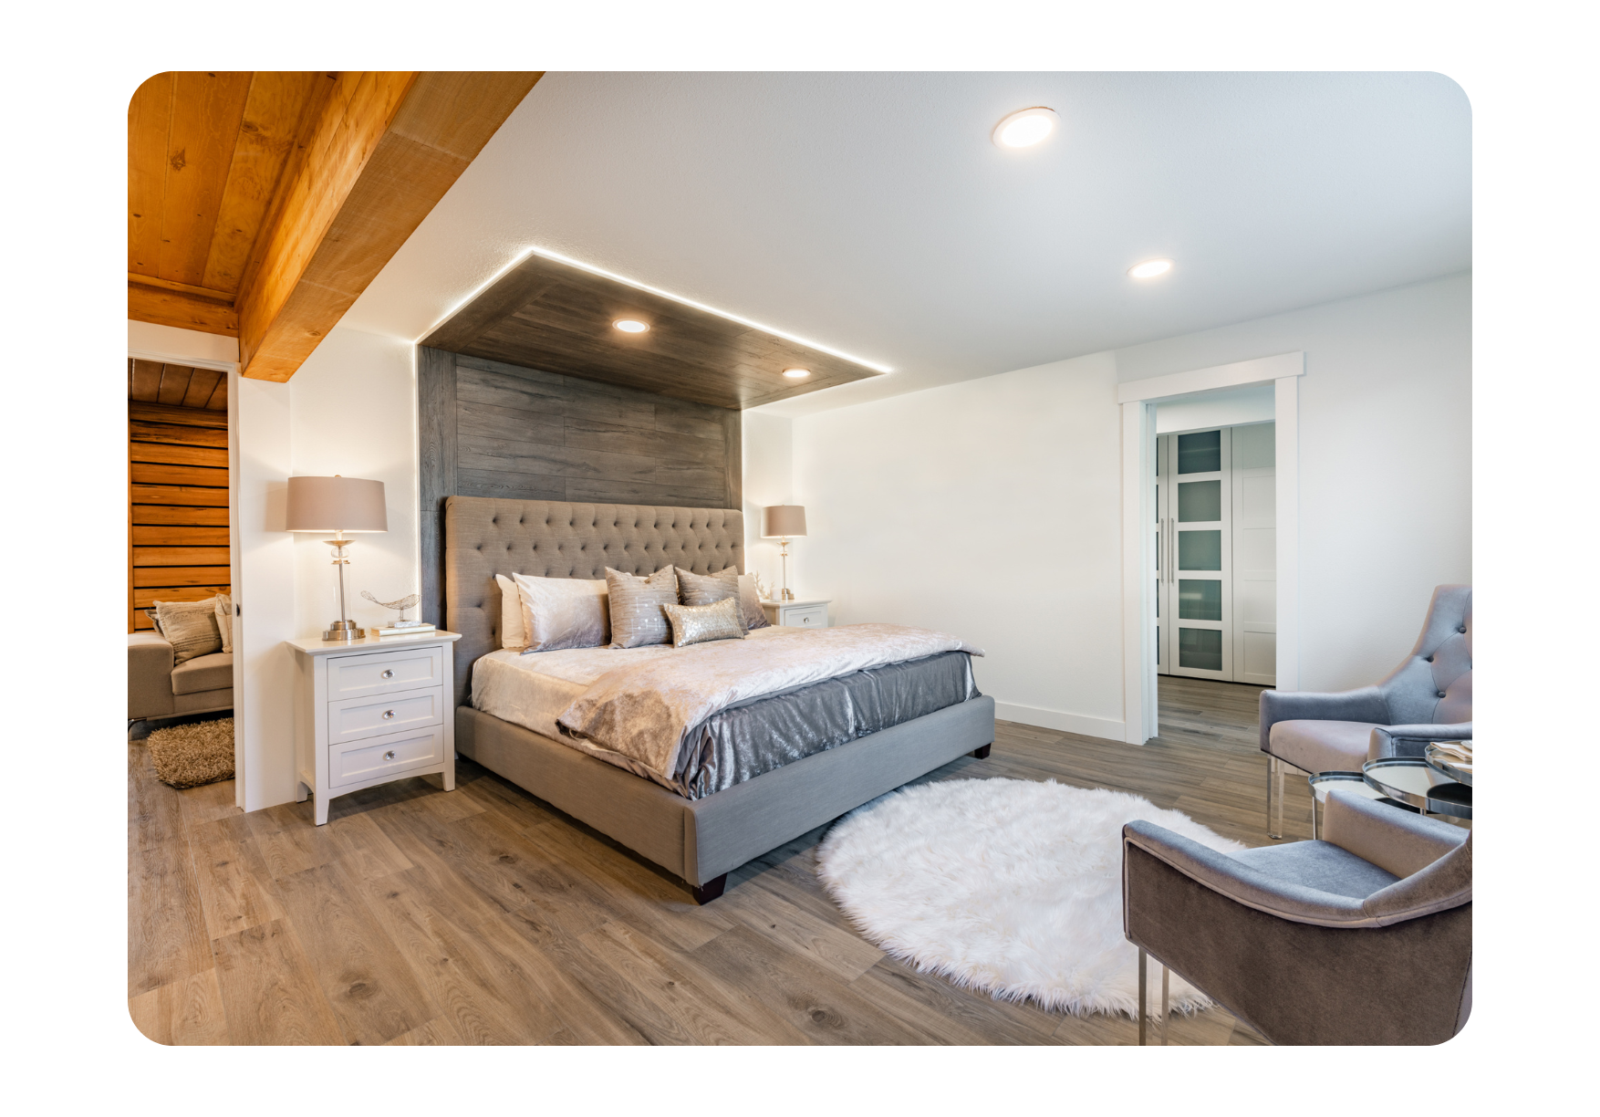
- 1-2 main bedroom shots – Ensure you get a full view of the room and at least one additional angle showing space and built-in storage if present.
- 1-2 main bathroom shots – Capture the full room showing bath/shower, and second angle showing the sink or toilet area if possible.
- 1-2 shots per additional bedroom – Again, try to get a full room view, covering two separate angles if space is generous.
- 2-3 garden and outdoor space shots – View from house looking out, view back towards house, and any special features (e.g. a patio or pond).
- 1-2 additional bathrooms/en-suites – Take one shot each for smaller spaces, two for larger bathrooms.
- 1-2 shots of additional reception rooms – For example, dining rooms, studies, or family rooms if present.
- 1 shot each of key features – Such as utility rooms, garages, driveways, period features, or any other standout details particular to a given property.
3. Tips for setting up the photoshoot
It’s important to set yourself up for success with each shot, and one way to do this is to ensure that the property is staged well in the first place. You may not always have full control over this, and the homeowner obviously has a part to play in preparing the home in advance.
The most critical thing is that the property is clean and clutter free, with the maximum amount of natural light illuminating the property. Equally, the outside of the home should (ideally) have a neat garden, clean patio and bins out of view for an impressive kerb appeal.
Here’s an overview of what should happen (ideally!) in terms of property staging before a photoshoot…
- All worktops and surfaces should be decluttered – For example, kitchen counters, coffee tables, bedside tables, and windowsills must be cleared. It’s an ‘easy win’ for staging purposes that dramatically improves the value of the photoshoot later.
- Personal photos and personal items should be removed – This helps buyers to envision themselves in the space, and once again, is quite easy for the home seller to do in advance of the shoot.
- Visible surfaces should be clean – Ideally, visible parts of the home like windows, floors, bathrooms, kitchens, and mirrors should be cleaned (even if there’s dust, dirt or clutter tucked behind cupboards).
- The kitchen should be cleared entirely – It’s often said that kitchens sell homes, so it is worth you and the home seller paying particular attention to this space. All appliances, magnets, washing up, and bins should be moved from view before photography begins.
- All beds should be made – Again, this is an easy win for homeowners. Clutter should also be removed from around beds and stored away where it can’t be seen.
- Bathrooms should be cleared completely – Much like the kitchen, bathrooms are a critical part of the home for buyers. All bottles, toiletries, toilet brushes, bins, and bathmats should be removed.
- Excess furniture should be removed – Across the home, it’s a good idea for all excess furniture to be out of view or stored elsewhere. This makes the home feel spacious and creates clear pathways through the home.
- All bins should be hidden – This is important for the inside and outside of the property.
- All lights should be turned on and curtains/blinds opened fully – Blown bulbs should be replaced to maximise lighting, with windows letting as much natural light into the home as possible.
- The front entrance and garden should be tidied – Ideally, homes should have the lawns mown, paths swept, and bins/toys removed to create an impressive kerb appeal.

Feel prepared for property photography?
We hope this brief guide helps you start taking better photos for properties online – whether for your listings or social media. However, we know that not everyone has the time, budget or skill to fork out for specialist camera equipment or spend lots of time taking property photos.
If that sounds like you, then PropertyBox’s image editing software might just be the solution. It’ll help you turn basic photos into professional images, letting you remove clutter, correct the weather and adjust the lighting at the touch of a button. Equally, our professional photography services can capture your listings to perfection – showcasing every property at its absolute best, without the time or effort on your part.

Emma Zeray
Campaign Executive
Emma is a marketer with an eye for detail, a love of creativity, and a passion for making stand out content. At PropertyBox, she helps bring property listings to life through smart, strategic email campaigns that connect with the right people at the right time. Full of drive, she’s keen to grow her skills across digital, content, and data-led marketing.