

Contents
Share
Struggling with your property photography? Don’t worry, we’re here to help with our essential DIY property photo tips for agents!
Snapping high-quality property images is vital for estate agents aiming to attract potential buyers.
Professional-looking photos improve the perception of a property, often meaning a faster sale and higher price.
In fact, according to another survey by VHT Studios, property listings with professional photos can see an average increase in sale price of 3% to 7%.
So, does this mean that agents should use professional photographers for every shoot? Absolutely not.
Due to the advancements in mobile technology and software, agents can now take DIY photos which almost rival the quality of professional photos.
However, a few common photography mistakes made by estate agents can drastically reduce the quality of property photos, and impact listing effectiveness.
In this blog, I’ll discuss key DIY property photography tips that helped me transform this living room shot from shameful to snazzy, without any professional help!
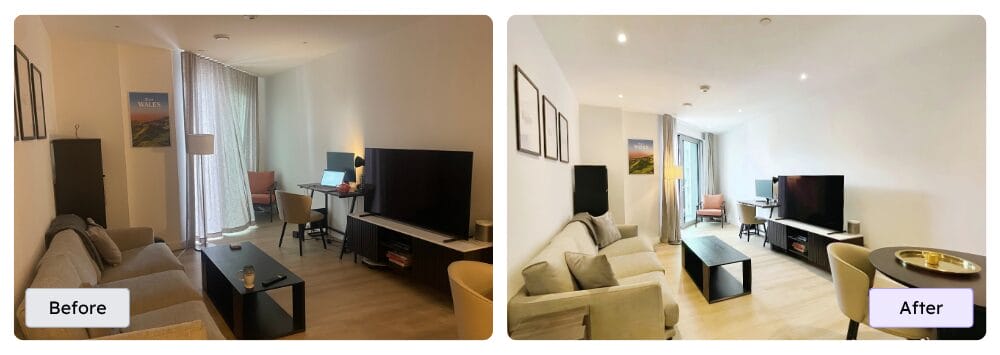
Photo Mistake 1: Bad Lighting
We don’t need to tell you that lighting is one of the most important factors in capturing good property photos.
Images that are too dark or unevenly lit can make properties look cramped and uninviting – both of which your buyer/renter is definitely not looking for!
How To Fix Bad Lighting In Property Photos
- Maximise natural light by shooting in daylight.
- Open curtains and blinds fully to let in as much light as possible.
- Turn on all interior lights.
- Adjust your ISO and aperture to balance exposure and avoid overexposure or underexposure.
In the images below you can see how just opening the curtains fully has already elevated image quality and made the room look bigger and more inviting.
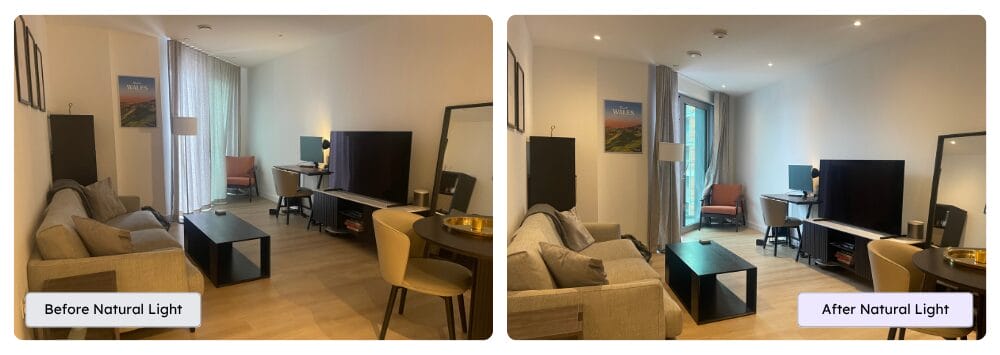
Photo Mistake 2: Cluttered Photos And Poor Staging
Personal items, clutter, or poorly arranged furniture in photos distracts the buyer and makes spaces look smaller or messy.
How To Prevent Cluttered Photos and Poor Staging
- Declutter every room by removing family photos, mess, and excess items.
- Suggest the vendor or landlords clean thoroughly before the shoot.
- Arrange furniture to create a spacious, inviting flow without pushing everything against walls.
In the before and after below you can see how taking two minutes to tidy up and stage the room’s furniture has completely transformed how the space appears.
I know which photo I would be more likely to click on!
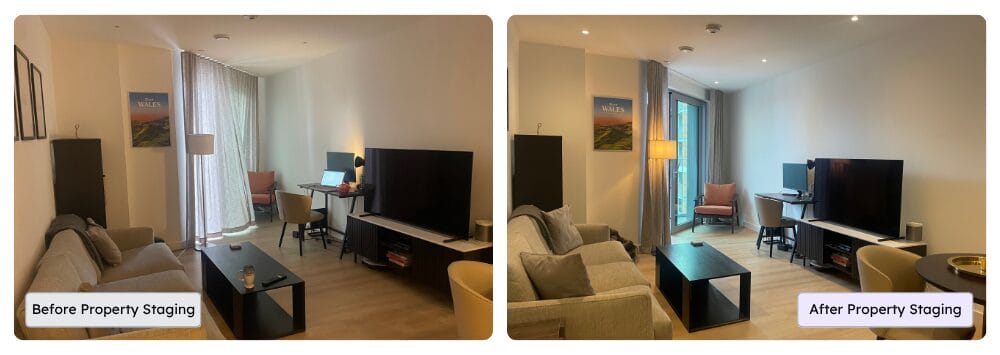
Photo Mistake 3: Misaligned Verticals And Horizontals
Leaning walls or tilting floors look unprofessional and are disorienting for the buyer or renter.
Even if you’ve taken the time to create good lighting for the photo and staged the room, a misaligned photo will still scream amateur.
How To Fix Misalignment In Property Photos
If you want to be ultra-precise use a tripod with a built-in level to keep the camera straight during shooting, or enable grid lines on your camera can act as a useful guide.
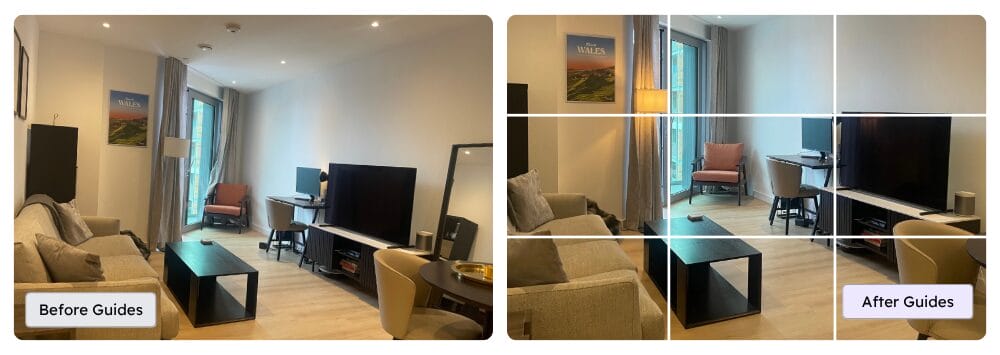
Photo Mistake 4: Not Removing Sensitive Content
This point is less about the art of taking photos and more about your professionalism as an agent.
Photos including pets, reflections, or unusual elements can deter buyers and reflect poorly on your agency’s attention to detail.
However, images including sensitive personal data can have more serious consequences, with your client’s security potentially being compromised.
How To Prevent Sensitive Content Featuring In Your Property Photos
- Remind your vendor to remove or hide distracting objects before the shoot.
- Ensure no people or pets appear in listing photos.
- Avoid reflective surfaces that show the photographer or clutter.
- Keep an eye out for any sensitive information like documents, or information that could compromise the homeowner’s security like key or camera locations.
We have a whole blog about data protection in listing content. You can find this here, and also download an informative one-pager to help your agency stay responsible with client data.
Bonus Point: Not Editing Your Photos
This one might be the most important of our DIY property photography tips.
Photo editing is vital to ensuring your photos look as polished as possible.
With photo editing tech now making this step super simple and quick, there’s no excuse for having low-quality, dull property photos on your agency’s listings.
Also, editing can help you with all the DIY property photography tips we have mentioned!
So, it doesn’t matter if you forget something whilst you are at the property! Phew.
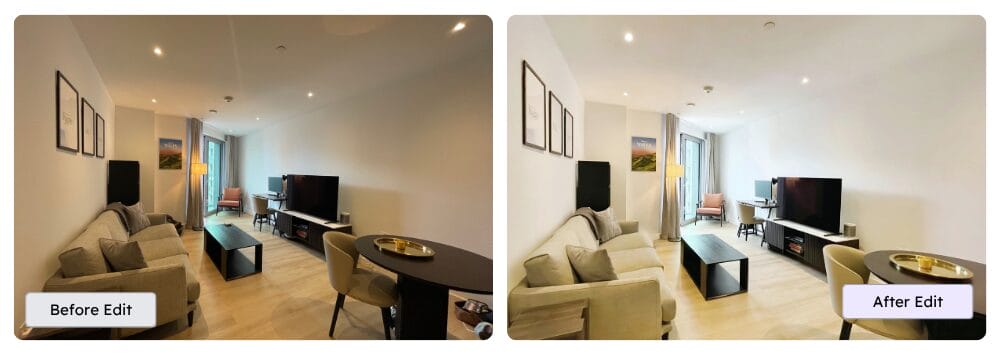
AI editing software like PropertyBox’s Photo Enhancement feature means lighting and alignment issues are automatically fixed in seconds with just a click. Plus you can remove clutter with the object removal tool, and our automatic GDPR privacy blurring feature will put your mind at ease in regard to client data privacy.
Take a look at the difference between the two photos below. The right image has been edited using our PropertyBox magic!
Conclusion
By avoiding these common mistakes and using these DIY property photography tips for bad lighting, staging, alignment and data protection you can ensure your DIY property photos look stunning and professional.
Prioritising high-quality visual content will help agents present properties in their best light, build client trust, and ultimately sell homes faster.

Jessica Peckett
Head of Marketing
Jessica is a New Zealand-born digital marketing expert with a global perspective and a track record of driving results across aviation, energy, and real estate. Currently focused on helping UK estate agents succeed through PropertyBox, she blends strategy, creativity, and tech to turn ideas into business impact. Passionate about team growth and meaningful leadership, Jessica brings energy, empathy, and a sharp commercial mindset to everything she does.